Unit 5 - Fire Safety Animation
Research - Public Information Safety Films
In this unit I will be creating a short fire safety animation in Flash. I will also be researching public information films previously made in the past and analysing their style method of delivery and main message of the film. The animation I will be making will be aimed at 10-12 year olds and will contain characters that will appeal to that audience. To help make the animation I will be making a storyboard to help convey the message of fire safety.


The first public information I looked at was about encouraging teenagers to learn to swim. The main message of the film was that not knowing how to swim is considered unimpressive and wouldn't make you very liked by others. Released in 1972 this cartoon aimed at teenagers warns them to learn how to swim, or risk social embarrassment and failure to attract the opposite sex. The female character’s illusion of her boyfriend ‘Dave’ being able ‘to do anything’ is shattered after she wishes they were at the seaside, where she discovers Dave can’t swim. He in turn wishes he didn’t ‘keep losing me birds’ after his girlfriend disappears with ‘Mike’ who ‘swims like a fish’. Since the 1970s the rate of deaths by drowning has fallen, but it is still the third most common cause of accidental death among the under 16s.
The second public information film I researched was about a cat named Charley, convincing children that you should not play with matches and if you see them you tell tell your guardian. In 1973 the incomprehensible pronouncements from a ginger cat named Charley warned children against strangers, matches, water safety and other everyday perils. By using Charley the cat in these public information films the are more appealing to children as they are able to relate to it better. I will use this film in particular to as inspiration for my film as previously said, the aim is to create an animation about fire safety, this film I researched relates to fire safety the most. The film shows a likely situation of how children can accidentally find matches in the house. Both children and parents can learn from this.


The last public information film I researched was about not talking to strangers. This one also involved Charley the cat. It tried to encourage children at the time to no interact with strangers to avoid danger. Cartoons and animals in public information films are very appealing to children as it they are more convincing to them. This film in particular was made to avoid children getting kidnapped or manipulated in some way. The main message of the film is that strangers can be found anywhere, including a park so children must avoid interacting with people they do not know and parents should also keep their children safe by supervising them closely.
Drawings & Designs - Characters
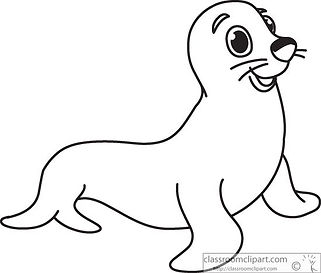
My fire safety animation will involve two animals acting as the main characters, one being a penguin and the other being a seal. I found both these images from the Internet and used them as inspiration when drawing my storyboard and designing the animals in Flash. The penguin's name is Joe and the Seal's name is Tim, I picked simple names as the target audience is children so they could be recognised easily. Designing the penguin and seal in Flash won't be too difficult as I deliberately searched for simple cartoon drawings of a penguin and seal. As it is going to be a cartoon not much detail is needed of the animals.
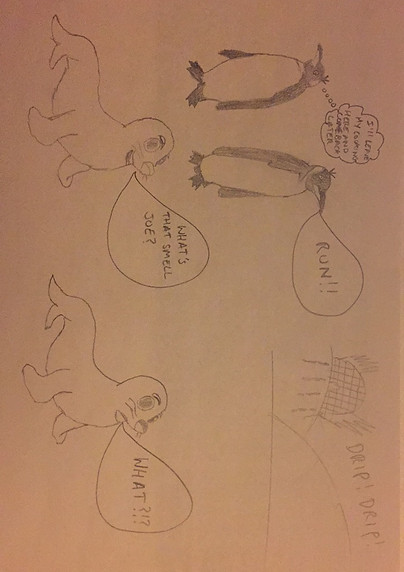
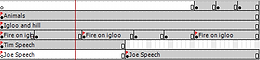
Here are some sketches of my own representation of the characters. I drew different angles and perspectives depending on where the characters will be facing during various scenes of the animation. I also included the dialogue that will be used in my animation. represented as either the character's thoughts or speech. I also drew various facial expressions of the characters. Throughout the animation the characters facial expressions will change depending on what they are saying or thinking. This didn't prove very difficult to draw as all I needed to do was alter the character's eye size or eyebrow height in order to change their expression.

Drawings & Designs - Storyboard
My storyboard that I drew up is about how Joe the penguin is cooking in a kitchen and decides to leave it and comeback later. Joe then leaves the room and his cooking starts to set on fire and burn. Joe's friend, Tim the seal then smells something coming from another room. Tim is confused and asks Joe what it is, but Joe is also confused. Joe then suddenly realises that he left his cooking unattended and Tim, panics. Joe and Tim then quickly run out of the igloo. The igloo blows up and can be seen in the distance on fire and melting. Tim then tells Joe to never leave cooking unattended for as it can easily start a fire.


Joe is cooking in the kitchen and decides that he will leave his cooking and comeback later. I set the scene in a kitchen because children would be able to relate it more easily.
Joe leaves the kitchen and his cooking starts to catch fire and burn. I made the flames bigger on top of and underneath the pan to express that Joe's cooking has gone out of control. This would show children how a fire would start if cooking was left unattended.
Joe's friend, Tim the seal asks him what the smell is. Tim and Joe both look confused and don't know what the smell is or where it is coming from. The smoke on left will indicate to children the result of leaving you cooking unattended and that there is a fire nearby.


Joe then suddenly remembers that he left his cooking in the kitchen. Tim panics and is shocked. I changed the facial expression for Tim to fit with what he is saying.
Tim and Joe both quickly run to door so they can leave the igloo before it explodes. Tim is still in shock.
The igloo explodes and can be seen in the distance melting and burning. Tim tells Joe to never leave cooking unattended otherwise it might catch fire, which is the main message of the film directed towards children.
Flash - Richard Williams' Walk/Run Cycle

Richard Williams is a Canadian-British animator who created this walking cycle template as a reference to how humans walk and how the movements would be implemented if animated. Williams drew each individual movement of a typical walk. Although there is not much movement of the characters in my animation it was helpful to get a good idea of how characters would be animated if they were walking. The image on the left shows each and every step of how humans walk, form when the legs lift to when their feet land on the ground.
This template is similar to the walk cycle however this one is for running. This template how more steps to it and more movements to it. I did not try animating this template, however I would imagine it being much harder, considering the walk cycle already was tedious and long for me. There is only one scene in my animation that involves running, however because I am using animals in my animation the movements would be different to humans.

Flash - Animating Techniques

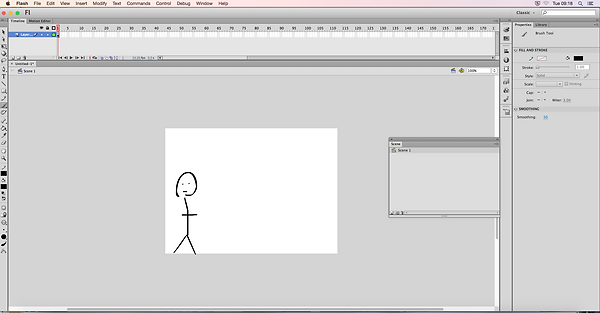
The aim of this exercise was to animate a man walking. Thanks to Richard William's Walking Cycle, I use it as a template when animating. The first step was simply importing the image into Flash so then I can paint over the stick men at a later stage. Each movement is already drawn on the template so all I need to do next is to paint over them at each key frame.

The second step is to use the paint brush tool to draw over each movement/step. The aim is to have a fully walking character by the end of it. I would have to keep repeating this step of painting over each movement to make the walk look realistic.


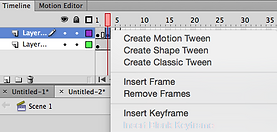
Each time I paint over a movement I must add 2 keyframes onto the timeline. Each movement is represented as 2 keyframes so that the steps are long enough. This is done by simply right-clicking on the white boxes and selecting 'Insert Frame'. I must remember to do this each time I paint over the character's movements.

I must then keep repeating steps 2 and 3 for the rest of the movements. Animating in Flash is generally a long process, even when creating simple animations such as this. If more time was spent painting the movements then the character would probably look better in the final animation, however the main objective was to creating a successful walking character.

Flash - Scenes

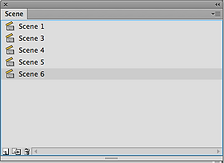
A way of being more organised when animating in Flash is to use scenes. This can be done my clicking on 'Window', hovering the cursor over 'Other Panels' and selecting 'Scene'. This will then open up the scenes box at the side.
Scenes allow you to essentially create new canvases to work without having to create an entirely new file. As seen on the image above you first create a scene which gives you a new canvas to animate on. After working on the scene/canvas you can add another scene which gives you another canvas to work on. You add as many scenes as you want and also duplicate scenes by using the tools at the bottom of the scenes box.
Rotoscoping
Rotoscoping is the rotated projection of a sequence of usually photographed action image frames so that the artist can trace from the frame or create an image to superimpose on it. It can be thought of as "painting on movies" efficiently. Prior to computers, an animation stand called a Rotoscope was used to project a sequence of action frames against a surface so that a set of animation frames could be traced or created. The same work can now be done with digital images and special computer software.


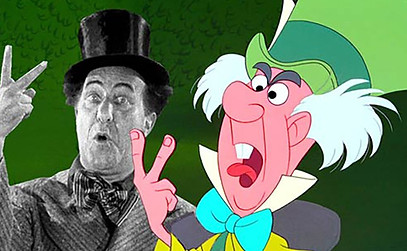
As seen the images above, real-life actors would act out the movements needed in the film or animation then the animators would create it. A rotoscope’s output may slightly deviate from the original true line of the image that vary between frames. When the frames are animated, an unnatural shake that is also referred to as a “boil” may result. Sometimes animators purposely use this effect. However, the effect is more commonly used to remove a single object form a movie scene in order to use it on a different background.
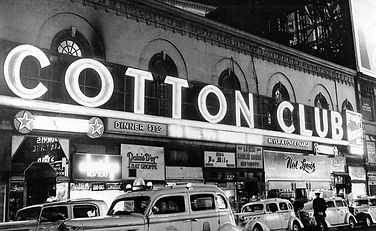
The Cotton Club might be Harlem’s most famous surviving jazz venue, but during the Harlem Renaissance that started after World War I and ended sometime during the Great Depression, it was also the neighborhood’s most notorious. White gangster and bootlegger Owney “The Killer” Madden bought and took over the club in 1923–the same year he was released on parole from what would have been a twenty year-long imprisonment at Sing Sing. At the time the selling and purchase of alcohol was illegal, however Madden used the Cotton Club as a way of selling it along with drugs. The Cotton Club had many great Jazz musicians and dancers. A popular dancer was Cab Calloway, in which animators used the rotoscoping technique to copy his dance movements in their animations/films.
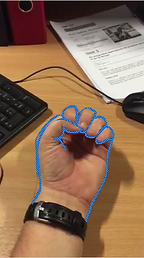
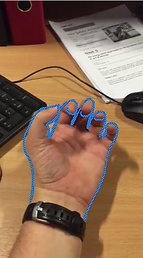
Here is an example of using the rotoscoping technique within Flash. I initially imported a short video of a hand opening up. I then used the pen tool in Flash to trace around the hand on each frame. It was a long process as I had to trace every frame of the hand opening up. This is how the rotoscoping technique would used if and actual film or animation was being made. Rotoscoping in Flash is essentially using a video as a template to create an animation.

Flash - Scene Development Of Fire Safety Animation

The first scene I needed to design is Joe the penguin standing in a kitchen cooking. So I started developing the penguin by using the reference image for the character as mentioned previously. It wasn't very difficult as I had the reference image to help me trace around the edges, however adding colour to the design was quite tedious and required more close attention.
The next thing I added in was the kitchen in the background. I used the kitchen I drew in my storyboard as reference when designing it in Flash. It wasn't very difficult as I already knew how it was going to be designed before hand. The penguin and the kitchen will be in the first scene of the animation. I added in more igloos in the background and can be seen in window. I did this to set the location as if it was taking place in the North Pole, considering the main characters are a penguin and a seal.


Then I started to add colour to the kitchen of the scene. I used the brush tool to colour the entire kitchen. This was quite a tedious task.

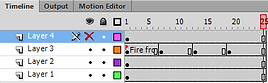
In the first scene Joe is simply cooking the kitchen. As seen below every five seconds I added a new key frame to layer 3 to make the fire on top of and underneath the pan increasingly bigger.


Then in the next scene Joe is walking out of the kitchen. As seen in the image below every three seconds I moved Joe downwards to create movement.

When Joe walks out of the kitchen the fire starts to go out of control. I used the same process as before, I increased the amount of flames every couple frames.


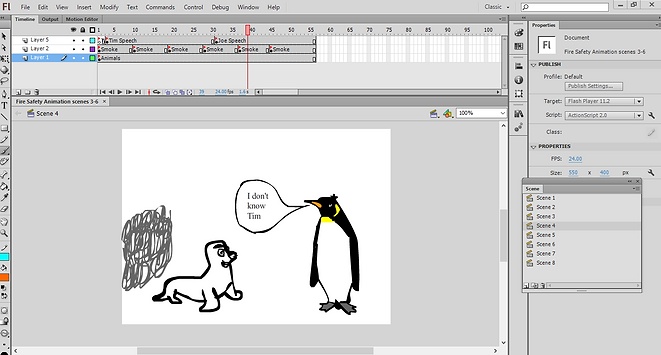
Tim is then curious about the smell and asks Joe what it is. The smoke behind Tim gets increasingly bigger during the scene.
Joe replies to Tim and doesn't know what the smell is. Behind Tim the smoke is getting increasingly bigger. As seen in the timeline I used the same technique.

Joe then remembers about his cooking he left in the kitchen. I capitalised the text to emphasise one of the main causes of a fire in a house.
Tim is shocked by this and I changed his facial expression after he hears Joe's response.


Both Tim and Joe turn to the door and run.
In this scene I used the same technique from scene 2, to make both Tim and Joe move towards the door. Every three seconds they both move a step.


In the last scene, Tim tells Joe to never leave cooking unattended (which is the moral of the animation/story). Tim's facial expression has also changed to a more angry face.
Joe then replies to Tim agreeing with him along with tears on the side of his face. In the background is the igloo on fire, it gets increasingly bigger during the scene.