
Unit 1 - Introduction To Visual Language
Past, Present & Future Postcards
In this unit I used Photoshop to cut out seperate images from various time periods to create my own interpretations of past, present and future events. In each photo I collected different images and merged them together. I used the rectangular marquee tool to transition one image to another. I also used the pen tool to cut out images and to remove their backgrounds in order to place them on new images. The images underneath the main postcard are each separate image I used to create the postcard, in order of the ones I used first.

Past
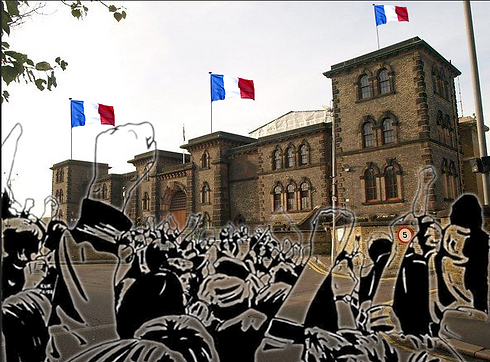
This is my interpretation of the Storming of the Bastille during the French Revolution in 1789. I used an image of a crowd/mob to represent people attacking the prison and I added French flags on top the prison as well.
On July 14th, 1789 the Bastille Prison was attacked by an angry and aggressive mob. The prison was attacked because is symbolised the King's power and reign. The crowd began to infiltrate the prison and started to free the inmates being held there.
I placed the transparent image of the mob on top of the prison image and adjusted the size. I enlarged the mob image to present the angry crowd attacking the prison. Lastly I placed three French flags on top of the prison to show patriotism and the location.
The reason I chose the French Revolution as my past event is because at the time its main purpose was to overthrow the monarchy, establish dictatorship under Napoleon and have King Louis XVI executed. To me it represents political backlash many countries have to deal with currently in the world.


Present
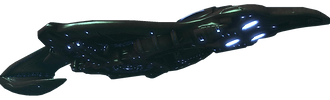
This is my own representation of 911, a terrorist attack the occured in 2001. I cut out an image of a plane and added smoke at the back with fire to to represent when a hijacked plane crashed into the World Trade Centre in 2001.
On the morning of September 11th, 2001 the terrorist group called al-Qaeda coordinated attacks against the US. Two planes were hijacked by 19 al-Qaeda terrorists and the they were crashed into the North and South towers of the World Trade Centre. This caused 2,996 deaths and over 6,000 injuries.
The reason I chose the 911 attacks to represent the amount of terrorist attacks happening in the world currently. 911 was one of the biggest terrorist attacks executed and allowed many other terrorist groups to commit such terror acts.


Future
This is the colonization of Mars that could possibly happen in the future. The picture shows a grand city on Mars with the Statue of Liberty in the background.
NASA plan on allowing humans to live on Mars by the 2030s. NASA has been using robots to explore Mars for the past 40 years. Companies such as Mars One and SpaceX are working on developing human settlement on Mars. Mars One focuses mainly on the funding, management of the mission, and finding the right teams to go to Mars. Whereas SpaceX focuses on creating the technology and spacecraft to send humans to Mars.
I put the Statue of Liberty in the background as a reference to the 1968 film Planet Of The Apes. It is a reference to the ending where the Statue of Liberty is found buried under the island, implying that humanity had been eliminated. I chose this possible future event because in my opinion it is a very likely scenario that could happen in the near future. Colonising Mars could provide as a backup place for humans living on Earth. Situations such as overpopulation, nuclear wars between countries, natural disasters and incurable diseases are all events that could happen, and colonising other planets like Marsin advance would prevent human extinction.


Photoshop Techniques
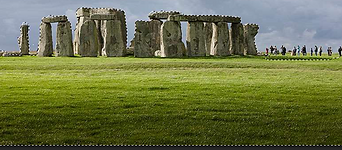
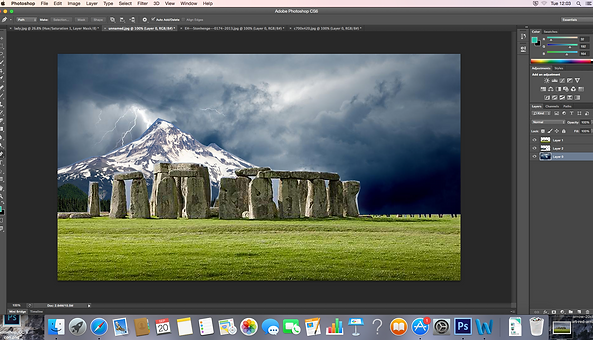
I used various tools and techniques in Photoshop in order to create some of the previous images. In a different task I cut out an image of Stonehenge and placed it on a stormy background with a mountain.


The quick selction tool automatically selects the main structure of Stonehenge and allows it to be cut out. In addition I used the pen tool to refine the image more, such as removing the small parts of the original sky background that was interfering with the main structure. As seen below the structure has been selected, excluding the sky.
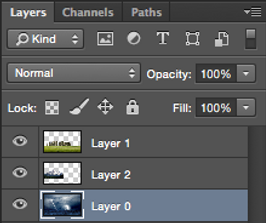
Next, I used simply copied the new stonehenge image onto a stormy background. As seen on the right side, the stonehenge layer is on top of the stormy sky layer, allowing the stormy sky to be in the background.


In this next step I used the same process to cut out an image of a mountain, but instead of using the quick selection tool I used the pen tool. I prefer to use the pen tool when cutting out images such as this because it is easier to select all the small details of the image. Like previously, only the mountain has been selected, excluding the sky.

Finally, I repeated this process with the mountain by copying and pasting it onto the final image. As seen on right side, the mountain layer is below the stonehenge layer but on top of the stormy sky layer, allowing it to be in the background.
Final Image

The Rule Of Thirds

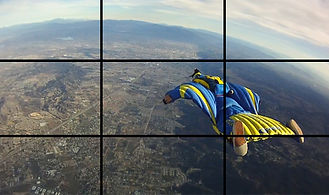
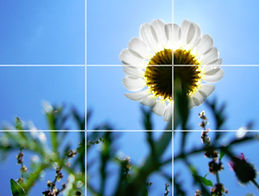
The rule of thirds is one of the most known rules of photographic composition. As seen on the left, the rule of thirds breaks down an image into nine sections. These nine sections identify the most important parts of the image. The theory is that if you place points of interest on the along the lines your photo becomes more balanced and will enable a viewer of the image to interact with it more naturally.
Wherever the intersections are placed, is the main area that people viewing the image see the most. In photography this is called the point of focus. On the image on the left, the intersections identify the boat the most, meaning that is the point of focus.
In particular, using the rule of thirds is a useful technique for images of landscapes.

Photoshop - Green Screen
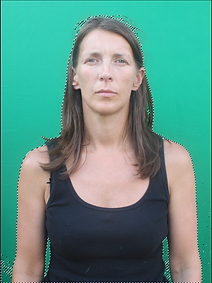
In this task I used similar techniques to remove a greenbackground, behind a picture of a lady and replaced it with a blue sky background instead.

The first thing I did was opened both images of the lady and the blue sky background in Photoshop, ready to be manipulated. Then I copied the blue sky image and pasted it onto the lady image. Then I began to use the colour range feature which selects the image based on tone and colour.


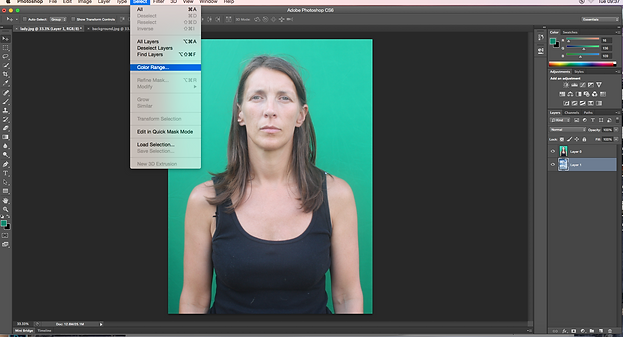

I then used the colour range tool to seperate and remove the green background form the lady. I did this by clicking on the green background and held down shift to make it all disappear. As a result of this, the area around the image of the lady was selected.


Next, I clicked on the quick mask tool in the bottom right corner which got rid of majority of the green background.
In order to remove all the small green areas around the lady, I had to use the eye dropper to select the green parts. I also set the saturation level to -100.
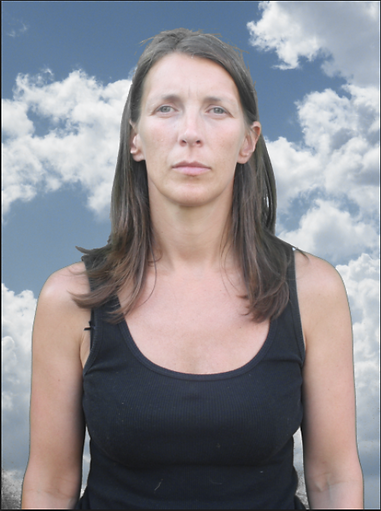
Final Image
The green background has been completely removed from the image and replaced with a blue sky background.
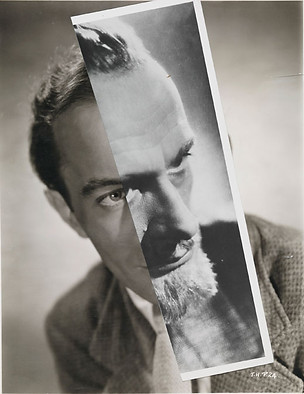
Artist Research - John Stezaker
John Stezaker is an English montage and collage artist. He uses old, existing pictures and merges them together to create a new work of art as seen on the right side. Stezaker is known for creating collages that portray different perspectives and surrealism to the picture. Using classic movie stills, vintage postcards and book illustrations, Stezaker gives old images a new meaning.

Manipulation techniques such as adjusting, inverting and cutting pictures to form something new. This gives pictures new context and allows them to be viewed differently from how they were originally.
Stezaker studied at the London Slade School Of Fine Art in the 1960s, which influenced a variety of his collages today. During this time, in France, the Situationist group of artists were arguing that reality had been replaced by an endless flow of images in the media. It was an idea Steazker was inspired by, using a cut-and-paste process to question the meaning of images. Stezaker mainly uses forgotten pictures from British cinema that were popular during his childhood, and then alienates the pictures by merging them with other ones.
His techniques for making these pictures has generally stayed the same since the 1970s.

Artist Research - David Hockney
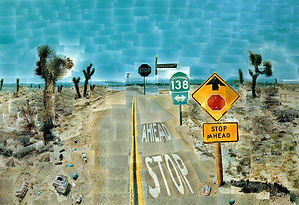
During the 1980s, Hockney experimented with joining and combining photos together to create new images. Hockney was an important contributor to the Pop art movement of the 1960s, he is considered one of the most influential British artists of the twentieth century.
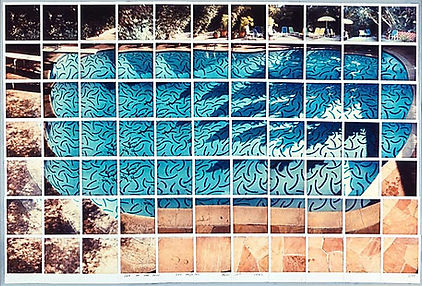
Some examples of the type of collages Hockney made are seen on the right. Hockney used a camera to take hundreds of pictures of the environment, so he could then merge them together. The subject would actually move while being photographed so that the piece would show the movements of the subject seen from the photographer's perspective. In later works Hockney changed his technique and moved the camera around the subject instead. When Hockney started creating these photo-collages, he called them 'joiners'. The creation of joiners occurred accidentally, from simply taking photos and arranging to make a composite image. He began this style of art by taking photographs of one subject and arranging them into a grid layout. The subject would actually move while being photographed so that the piece would show the movements of the subject seen from the photographer's perspective. In later works Hockney changed his technique and moved the camera around the subject instead.

Hockney noticed in the late sixties that photographers were using cameras with angled lenses to take pictures. He did not like such photographs because they always came out somewhat distorted. He was working on a painting of a living room and terrace in Los Angeles. He took shots of the living room and glued them together, not intending for them to be a composition on their own. Upon looking at the final composition, he realized it created a story, as if the viewer was moving through the room.
From 1982 Hockney explored the use of the camera, making composite images of Polaroid photographs arranged in a rectangular grid. Later he used regular prints to create photo collages, creating a complete picture from a series of individually photographed details.
As the complexity of the joiners increased, he started to use even more photos, this allowed him to hugely increase the complexity of the pieces. His longest collage took 5 hours to complete.