
Unit 10 - Doodle
Research - Interactive Toys On The Web
Interactive toys are used to keep users on website or entertain. The most famous interactive toys are the ones that appear on the Google home page. They are called the google doodle. For this project I will create my own doodle and will be interactive so when I cover the mouse over it something happens. Below I have researched three different google doodles that I found on the internet.
Google Gameday Doodle Kickooff
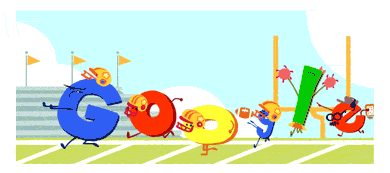
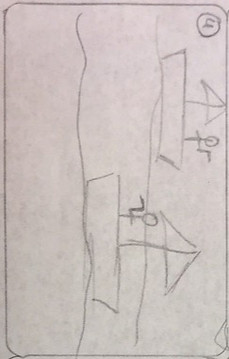
The first google doodle I found was the one on the left. It's theme is a soccer/football field with the letter representing the players.
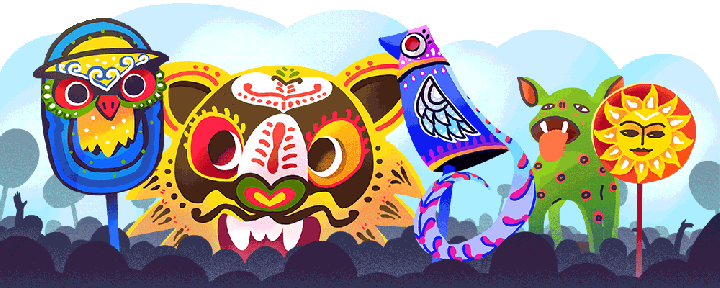
The second google doodle I found was the one on the right side. The theme is a festival with puppets and animals.
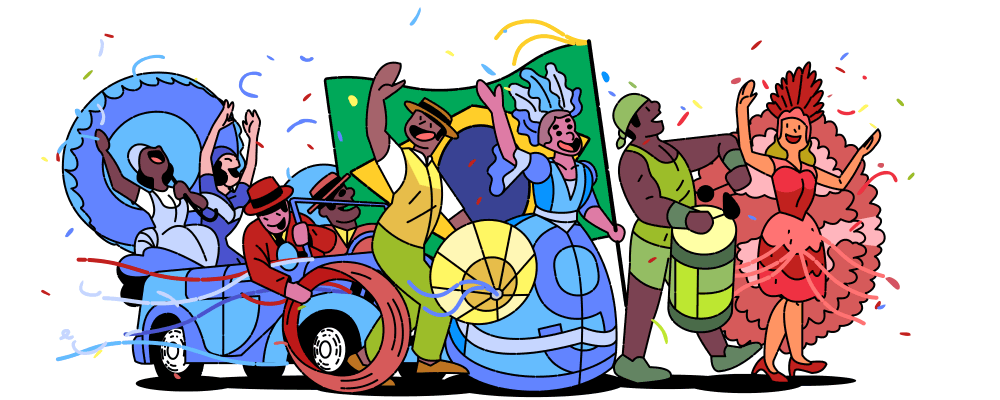
Carnaval 2017 (Brazil)
The last google doodle I found was this one of a carnaval with the people representing the letters of 'google'.
Research - Non-Linear Animations
Animation that is based on series of scenes that have different timelines and have key frames that could load dynamically content from external or internal sources. Examples of programs that could produce non-linear animations are Adobe Flash or any program that could stop the timeline and execute scripts in a particular key frame.
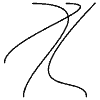
On the left are two simple examples of non-linear animations. This short movie consists of three obviously distinct stages, with two of them dominated by exploding and imploding circles, and the third intermediate stage featuring a left-to-right motion theme.
Below are some techniques used that make up a non-linear animation. I researched this information from this website.
-
Accelerate or decelerate all instances of motion. Constant speed adds a mechanic feeling to any movement. Imagine that every element in your composition has a certain mass, and therefore cannot start or stop moving too abruptly. When you need some object to move and then stop, or to stay for some time and then start moving, gradual decelerating or accelerating is a must; but even for the cases where an object just keeps moving without stopping (for example, until it gets out of sight), adding some second derivative (which is the mathematical equivalent for the physical concept of acceleration) will make its movement more natural and engaging.
-
Use curvilinear motion paths instead of linear ones where possible, even if the curve is a simple circle. When moving an object along a linear path, rotating it at some degree during the shift will help to enliven it. Using rotation in combination with acceleration or deceleration will make a motion much more organic.
-
Adding a third dimension to your motion may compensate for its too linear character. By this I do not mean real 3D, only a simple trick of enlarging or reducing an object dynamically thus giving it an impression of "emerging" or "sinking" relative to the plane of the screen. Again, this technique can be used in combination with linear motion, accelerating/decelerating and rotation.
-
Colour and texture effects can, to some extent, mask the linearity of a motion. Combined with a gradual darkening/lightening, transparency variation, or a moving highlight
-
Similarly, about any transformation of an object, such as shape morphing or tweening, forces us to watch it with much closer attention, even if the object is immobile or involved in a simple linear motion. Transformations are something computers can do amazingly well, and creative opportunities are enormous.
-
With linear motions, try, at the very least, to make them as short as possible; avoid frustrating the viewer by pushing an object too far in a too monotonous manner. For short bits of motion, it is much more difficult for the eye to notice their linearity.
-
Furthermore, use a number of short linear movements of different objects instead of a single object's complex motion path. With a vector format such as Flash, you can use multiple instances of the same object moving simultaneously in different points and directions to create an impressive "swarming" effect with minimum bandwidth. Generally, always attempt to compress your movie's timespan by partially overlapping consecutive animation stages so that the entire clip looks more dynamic and the possible deficiencies of each single object's behavior are less noticeable.
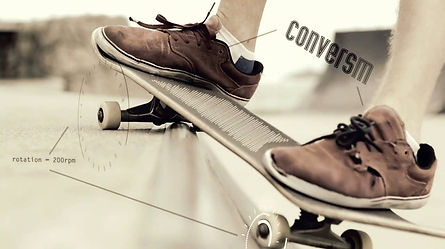
Day Time & Night Time Animation
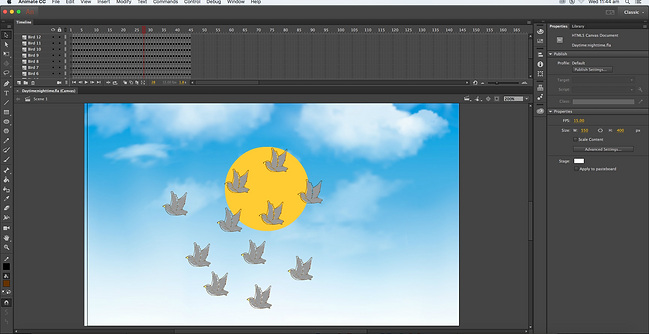
My idea for an interactive animation is a day time and night time theme. The animation will start off with a blue sky in the background and the sun shining brightly in the sky, it will be surrounded by birds flying around as if it were morning. This will represent the day time. Then once clicked on the background will change into a night sky with moon presenting itself. It will be surrounded by stars and UFOs flying around it. So essentially the animation will start off as day time and then once clicked on it will turn to night time.
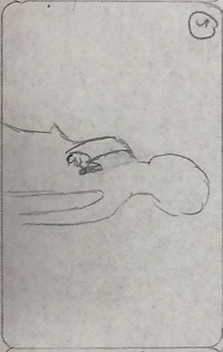
On the right is a great example of how I want my animation to be like. It is quite similar to how I want my one. I will be using this one as reference and inspiration.


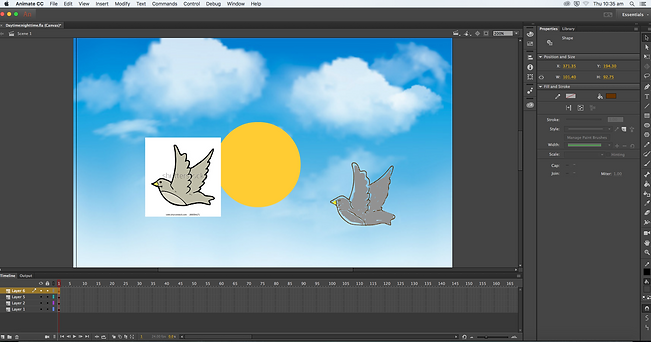
I began by simply finding a blue sky background from Google images and imported onto the canvas in Animate. This will be the start of the animation (Day time).
The next step is to simply create the sun by making a circle shape in the middle of the sky. Then I got an image of a bird from Google and began tracing over it.
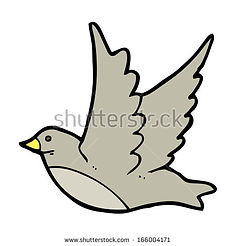

I have not drawn/traced the bird from the reference image. It is now ready to be duplicated and animated further on.
Next I duplicated the bird one by one and animated each individual movement. The aim is to make it look like the birds are flying together in a pack.
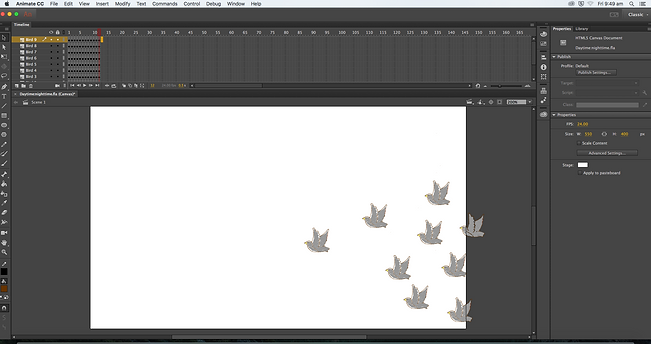

I have now finished animating the birds across the screen from one side to the other. I will now make some adjustments to it such as increasing the frame span to make the birds fly slower.
In order to make the birds appear like they are flying slower I must reduce the frame-rate. I decreased it to 15FPS.


Now I have finished making the day time animation I can now begin to make the night time animation. I started by using a night sky background from Google Images and also importing a moon image into the scene.
Now I have began animating the UFOs into the scene flying across to the other side.

Unit 10 - James Bond Title Sequence Part 1
Research - Motion Graphics
In this part of the unit I will create a title sequence for a new James Bond film. I will choose a name and soundtrack for the film and consider the style, which era it will be, choose a limited colour palette and build a storyboard. Using Compositing software (After Effects) I will create motion graphics that capture the essence of a Bond movie. The James Bond series of films are famous for their iconic title sequences. The sequences have become stars in themselves and employ cutting edge motion graphic techniques. Fashion, soundtracks and VFX are all important and the overall style.
As digital technologies continue to create innovations in the world of experiential graphic design, motion design is becoming an increasingly important competency. Essentially, motion design is a discipline that applies graphic design principles to filmmaking and video production through use of animation and visual effects. Examples include films, videos, animated text, and web-based animations and apps.
Motion design has evolved as a direct result of technology improvements. With many traditional environmental graphic design installations now incorporating digital components, motion design becomes an important tool in the designer’s toolkit. Designing type in motion is a key skill. With motion design comes the tool of time which adds a whole new dimension to graphics.
Research - History Of Bond Title Sequences
Below is a brief history of some of the James Bond title sequences from the movies over the past couple of years. I have chosen a few which I like in order of the movie's release date. I used this website as a reference for the information below.
Casino Royale (2006)
It’s a neat title sequence, apart from the fights that Bond is having with the men in red, which feels like overkill. As Art of the Title points out, however, it is much more in line with the more modern, violent Daniel Craig-era Bond. The amount of colour is refreshing, as is the visual symmetry. The bit where Bond is sitting and screwing the silencer on to his gun is a cool visual. The only woman is when Bond’s sight comes across Eva Green. But he doesn’t shoot. He’s not a monster. Yet.
Skyfall (2013)
It’s an impressive sequence, shot by the returning Kleinman, until the weird dragons and the point at which it all starts resembling Gnarls Barkley’s Crazy video. The sequence is a far cry away from the ’60s or ’70s Bond openings, and reflects the change in tone that the franchise has undergone as social mores have changed. Even though Bond remains one of the most conservative franchises in existence, we now live in the age of the gritty anti-hero and easily accessible pornography, which has made sequences like On Her Majesty’s Secret Service feel out-dated and tame. As the Bond franchise has progressed, meta commentary within the sequences has also become a theme that is increasingly obvious: Skyfall, after all, leaves us closing in on Bond’s eye, which as we all know, is the mirror to the soul.
Research - Title Sequence Artists
Below are some title sequence artists that I found and typed up about. I have included the title sequence they worked on and what I like about the creation of the title sequence.
Ant-Man (2015) - Sarofsky
Marvel's Ant-Man that was released in 2015 had its title sequence created by Sarofsky, which specialises in live action production, visual effects, 3D development, design, animation and more. What I like about this title sequence is that every time the camera moves inwards, more credits show and it continues to do this throughout the title sequence.
Thor: The Dark World (2013) - Blur Studio
Another Marvel film - Thor: The Dark World had its title sequence produced by Blur Studio. I like the 3D visuals in this title sequence because it was made to look like the figures and characters were paintings that come to life.
World War Z (2013) - Prologue Films
The last title sequence I researched was the one from World War Z. It was designed and produced b Prologue Films and what I like about it is how it is made up of short sections of the film almost like a trailer.
Research - Characteristics Of James Bond Title Sequences
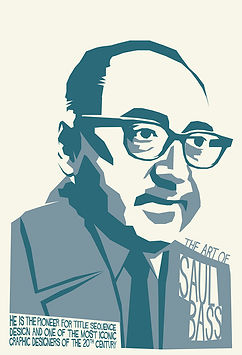
Saul Bass
Saul bass was an American graphics designers that worked on many title sequences for films during his time. He is a widely acclaimed graphic designer with a career spanning over 40 years. Among his most famous works are the title sequences for such classic films as The Man with the Golden Arm (1955), North by Northwest (1959), and Psycho (1960). Bass used his innovative ideas and unique perspective of the world to influence his art, engaging his audiences and developing the graphic design industry in the process.
Maurice Binder
Maurice Binder was a film title designer best known for his work on 14 James Bond films including the first, Dr. No in 1962. He was born in New York City, but mostly worked in Britain from the 1950s onwards.
Maurice created the signature gun barrel sequence for the opening titles of Dr. No. He is also best known for his scenes featuring women performing a variety of activities such as dancing, jumping on a trampoline, or shooting weapons. Both types of scenes are trademarks and staples of the James Bond title sequences.

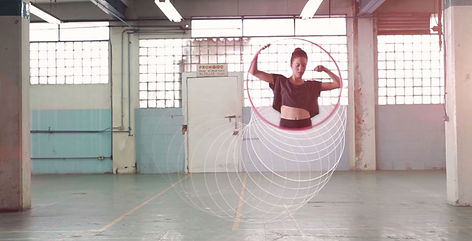
Research - Moodboard
Below is a moodboard of some examples of motion graphics. I have composed a collection of various designs of motion graphics and made it into a moodboard.


Research - Storyboard
I have drawn up a storyboard of my own James Bond title sequence. Below that I have explained in detail what is going on in each scene.
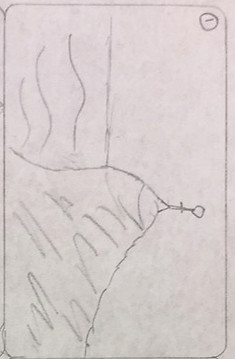
Scene 1
In the first scene a dark-shadowy figure can be seen standing on a cliff near the sea, just staring in the distance.

Scene 2
In the second scene the dark figure (which is Bond) can be seen jumping off the cliff.
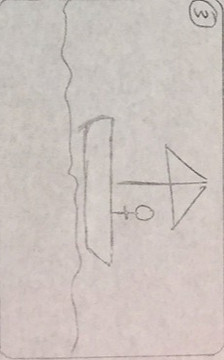
Scene 3
Bond then falls into a boat in the sea afterwards.
Scene 4
While Bond is sailing in the boat he see another boat in the distance and starts to take his gun out.
Scene 5
The camera then points to the front of Bond's figure where Bond is about to shoot.

Scene 6
The last scene involves Bond shooting into the camera and blood filling the screen.
Recordings - Real Life Scenes
Below is the few real-life recordings I have to make for my title sequence. The real life recordings will be composited into the propers scenes in After Effects.
The short recording on the left represents both scenes 1 and 2. It shows Bond standing and staring in the distance and then jumping off the cliff. The green screen will be replaced with a background of a cliff next to the sea. This will be composited later in After Effects.
The next recording shows Bond falling through the sky from jumping off the cliff.
The next recording simply shows Bond after he was falling through the sky. It represents him landing the boat, which will also be composited soon.
Composting/Modelling - Maya & After FX Boat Scene

I created the boat scene within Maya by modelling three boats and using the built in water feature. I then animated the boats so they could move.
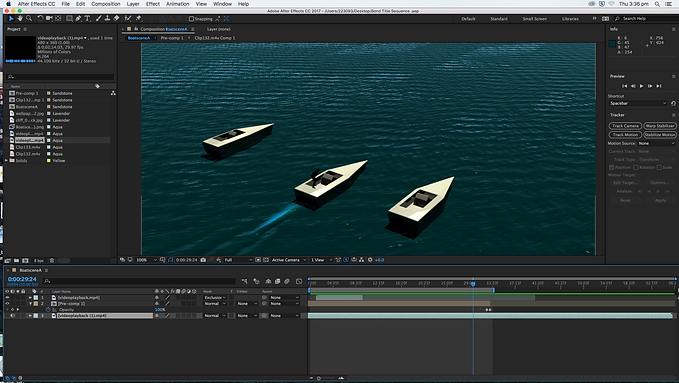
After a long render of the boat scene in Maya I imported it into After Effects. You can see the add realism from the final render in After Effects on the right.

On the left is the render of the boat scene
Updated Storyboard - Silhouette
I updated my storyboard in photoshop and made the characters as silhouettes. This updated storyboard shows a more realistic representation of what my title sequence will look like throughout. I also filled it with colour.

After Effects - Falling Scene

On the right is the scene of bond falling through the sky. I replaced the green screen with a background of the ocean and cliff and re-sized Bond to look as if he is falling through the sky.
Next I changed the colour of the ocean to match the shade of blue on the boat scene water. I also made my Bond into a silhoutte.

After Effects - Landing In The Boat
I went back to the boat scene and made Bond look as if he is falling and landing into the boat as it then speeds off into the distance with the other boats.
After Effects - Gun Scene
The next scene involves Bond seeing the enemy and pointing his gun towards him about to shoot.

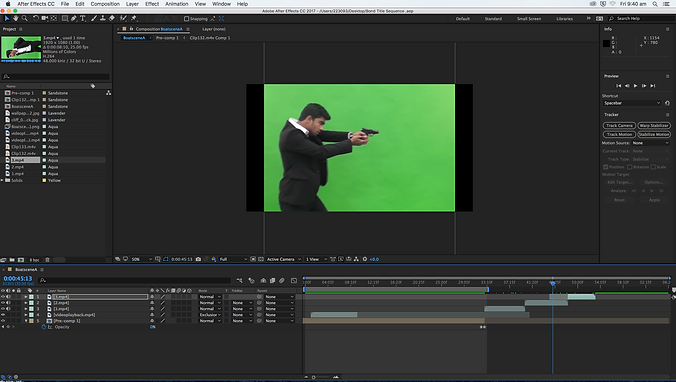
This clip is the same however the enemy is on the opposite boat and sees Bond.
I now changed the background to a cliff and sea and also made Bond into a silhouette.


I then did that same thing for the second to last scene where Bond points his gun at the enemy
The very last scene is blood on the screen right after bond fires his gun.

Final Render
Unit 10- Mech Rigging
Maya - Experimentation
In this section of the Unit 10 the aim is to model a simple character (mech), rig this character considering what movements the character will be making. This can be done by using parent child relationships to control the movement. Character rigging is an essential part of any animation. It is a complex and difficult process which involves knowledge of modelling, an understanding of biomechanics and the requirements of the final animation. It is necessary to understand what movements an animator will want to do, i.e a character playing the piano will probably be sitting but have lots of movement with their fingers but a character running will have large movements with their lower body and will require IK rigging to control the feet. But will not require the delicate individual bones of the hand to be rigged.

Lizard
The first experiment I did was rigging a lizard. I used the default lizard that can be created automatically in Maya.

Human
The next thing I experimented on was the default human model in Maya. I found the human easier to rig and animate compared to the lizard because the human model had more fluid body movements than the lizard. As seen in the image on the right I attempted to animate the legs of the human.

Robot Arm
The next experimentation I did was of a robot arm. You can't see the IK handles or the skeleton in the image however it has been rigged and as it can see each component of the robot arm will follow along with whatever has been rotated.

Dinosaur
The last experimentation I did was of a dinosaur. As you can see in the image on the right you can see the rigging and skeleton inside. The legs, head and arms have all been rigged and can ben animated together.
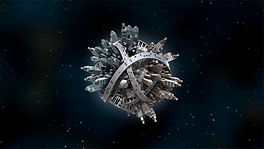
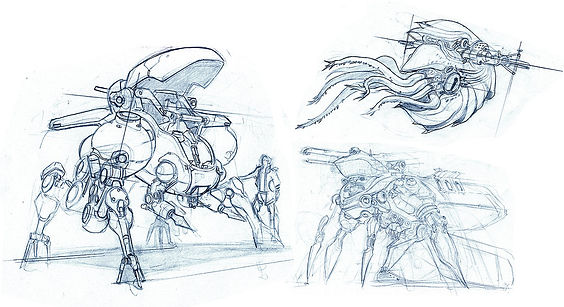
Research - Mech Examples
Below I have researched some mechs that I found from Google images. I listed the ones I liked the most,as soon I will use them as inspiration to sketch me own mech on paper.


Research - Mech Sketch
On the left is some experimentation sketches for my upcoming mech.

On right is a sketch of what my mech will look like. I wanted my mech to have a simplistic look to it and that's how my final sketch looked like. I think that it will be easier to rig it as the design is simpler as well as initially modelling it in Maya.

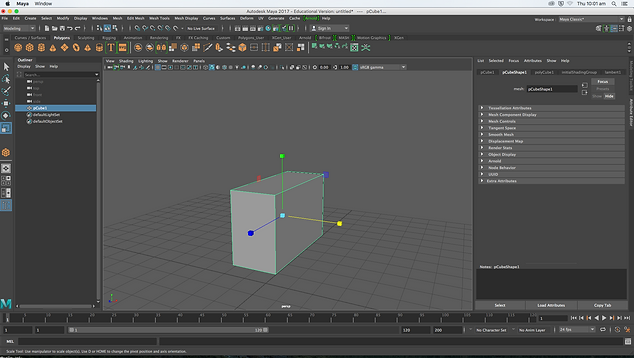
Maya - Modelling The Mech
I began modelling my mech by firstly creating a large rectangular box and scaling it.
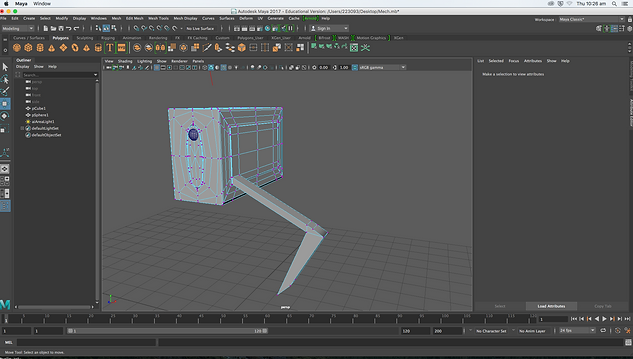
Next I created the small air vent on the side of the rectangular box.


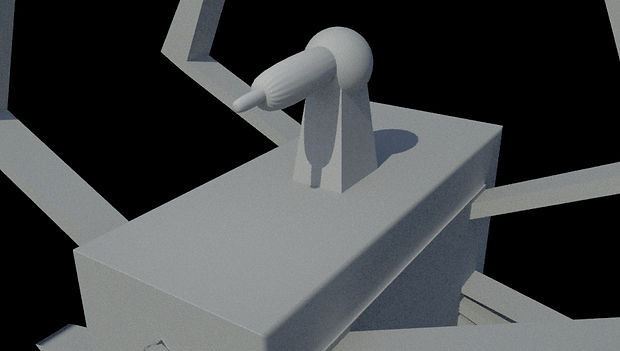
After I created the small circle at the front, this represents the eye of the mech.
In this next step I created the leg by extruding one of the faces on the side. I then adjusted the vertexes to create a more pointy appearance for the leg.
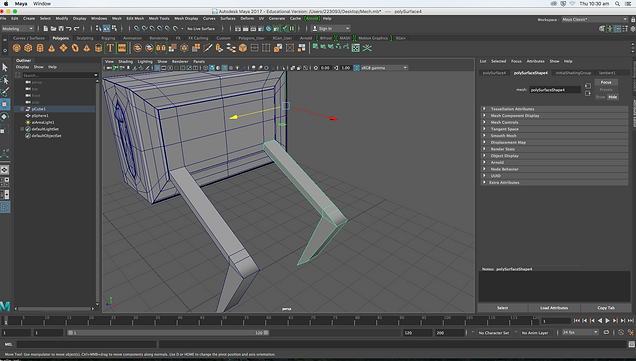
I duplicated the leg that I created in the previous step and moved it to the back, next I will have to duplicated another two legs for the other side and then mirror them.
I decided to make my mech more interesting by duplicating the legs even more and playing with the sizes. This way it looks more intimidating.


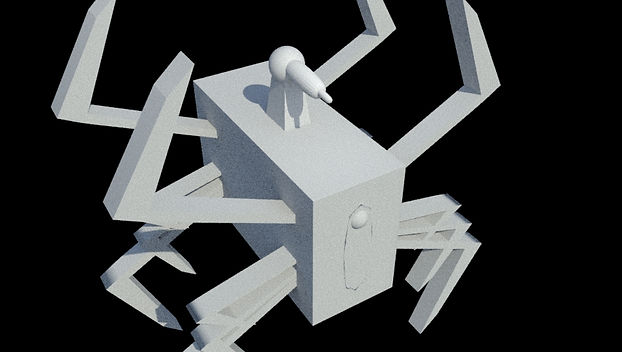
Finally I created the small turret on top of the mech.
Renders

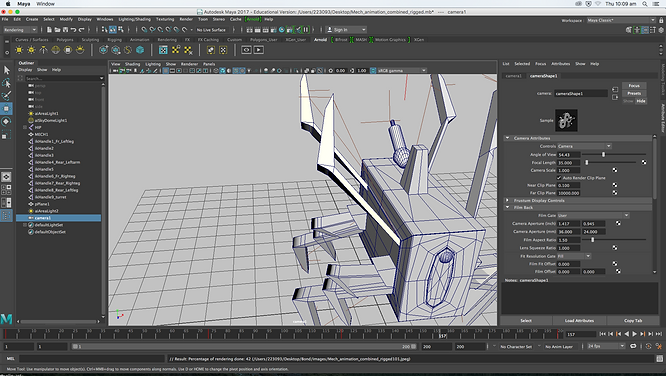
Maya - Rigging the Mech
The next stage involves the actual mech rigging which I did on the right side.


Now that the mech has been rigged you can see on the image on the left that the legs of my mech can be moved smoothly. This will help when making the actual animation of the mech later on.
Maya - Mech Animation
The last thing I need to do is create the final animation to show how the rig works. My mech animation is just going to simply show my mech moving forward. I began animating the mech my moving its legs.


On the right image you can see that I am playing around with the perspective and changing the camera views, I continue to use this technique throughout the animation.
In the image I have changed the perspective again to a more close up view of the mech. I have also began moving the arms on top.
Final Animation
Project Evaluation
The theme of this project was firstly creating a Google doodle, then composting my own James Bond title sequence and lastly mech rigging. I thought that all three parts of the unit were all closely related as they all involved some kind of animating. The part of the project I found the most interesting was definitely the mech rigging, more specifically the modelling of the mech. The technique that I found new was the rigging process i.e - joint and IK handles. The technique I would like to develop further would the 3D animation in Maya as I did in the mech rigging section of the project. The aspects of animation and games I researched through this project were flash animation, After Effects compositing, 3D modelling and Maya animation. These aspects influenced my project by allowing to use them as proof to demonstrate the techniques I learnt. The technique I enjoyed the most was rigging of the mech as I found this the most interesting new. The most successful part of my project was definitely the mech rigging because I think that the final renders of the mech turned out to my liking. Some problems I encountered in project were some of the scene in the James Bond title sequence as recording some of the scenes were difficult. I learnt from these problems by using the compositing process to my advantage in After Effects. If I given the chance to re-do the project again I would change the storyboard of my James Bond title sequence and make it more simple so I could have made it easier to composite in After Effects.