Unit 4 - Materials, Processes & Technical Skills
Research - Architectual Visualizations
The aim of this unit is to model a New York City rooftop in Autodesk Maya. Before starting any modelling I did some research into how a typical rooftop of New York is structured and designed. In addition I experimented with various techniques and tools in Autodesk Maya to help me when modelling.

The first bit of research I did before starting the actual project was looking into three architectural visualisations of New York City and discussing how they were created.
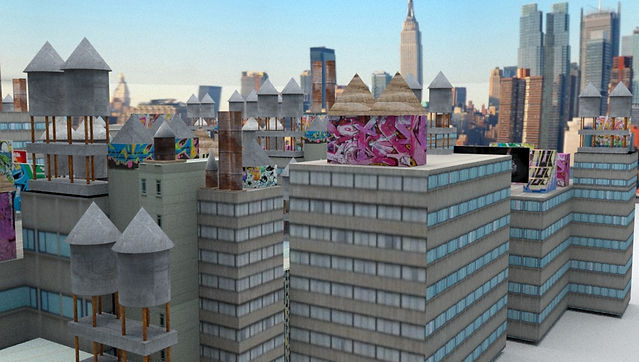
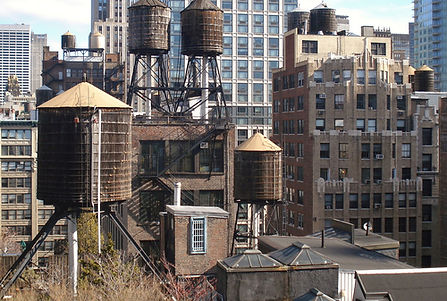
The first visualisation on the left is an image of a Tower and other smaller buildings in New York. This architectural rendering shows more of the outskirts of and the smaller areas of New York rather than the City's known buildings. The buildings in the image have simple and common designs, with a rectangular look to them. Below both the towers are some smaller buildings, most likely apartments and offices, these structures show a more 'blocky' look to them. On the right are more zoomed in images of the visualisation. Both images show the smaller buildings and the two towers.


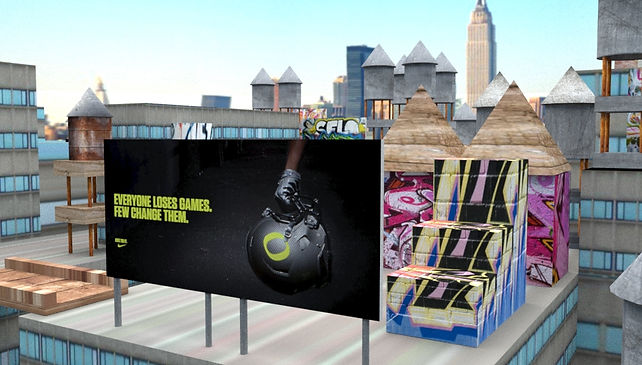
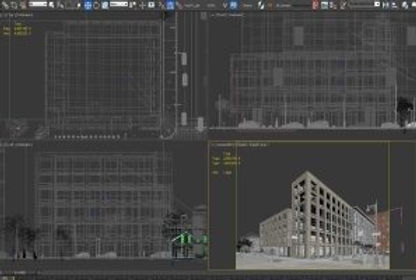
The second architectural visualisation I researched was a render of the NYrender Company building in New York City. I think this service design firm building has a more modern look to it compared to the previous visualisation. The large windows around the building are very common features in office buildings in New York.
Below are two images of how the building was created in the software. The building was most likely designed in the software then an image of New York towers was placed in the background to set its location. When created two, tall rectangular structures would of had to be extruded from the ground up initially. Then the windows would of been implemented by cutting holes in the building and extruding inwards.

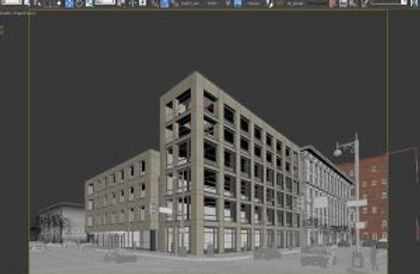

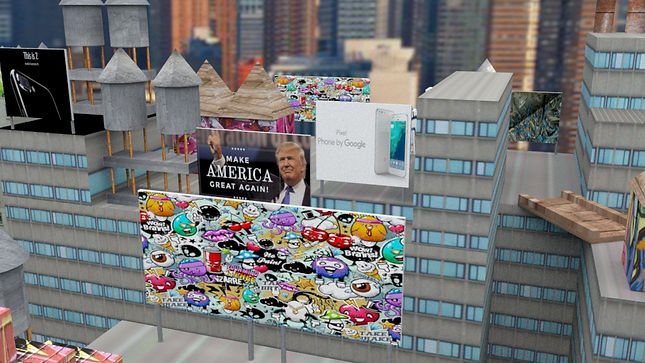
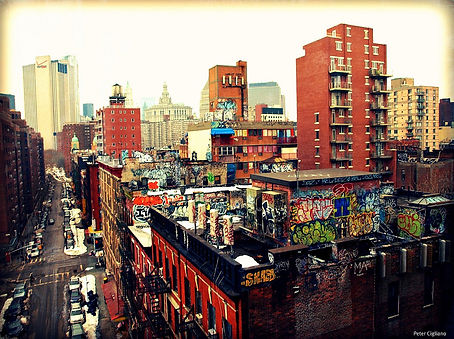
The third architectural visualisation shows more of a street view of New York City. The buildings are mostly rectangular just like the previous visualisation, however there are two structures in this image which have a more circular presentation. The buildings look more traditional and old, compared to the previous image.
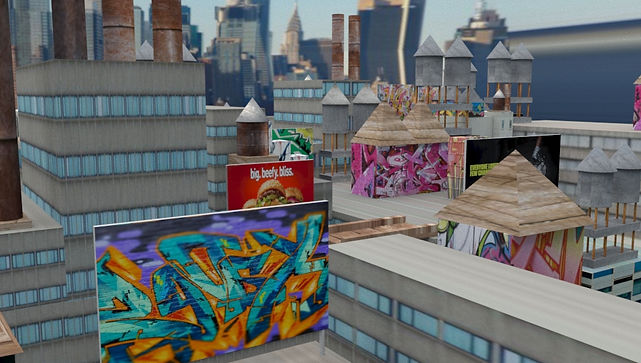
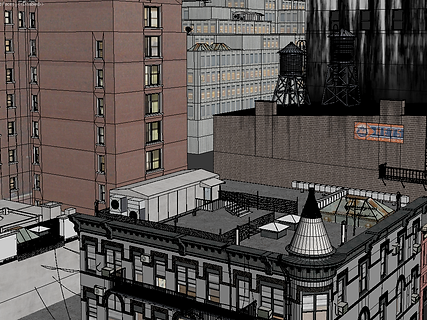
The bottom-right image shows a typical rooftop in New York City. Although my rooftop will be designed on a larger scale, most rooftops in New York would have this look to it. The small huts and the water tanks on the rooftop are very common features of rooftops in New York.

Research - City Rooftops In Games
The second bit of research I did was finding rooftops in games. The rooftops I researched weren't all from New York City but the way they were designed will help me when creating my own rooftop.

This rooftop is from Tom Clancy's The Division, and shows a more gritty and destroyed version of a typical New York rooftop. It has common features of a New York rooftop such as air conditioners, billboards and large huts, all of which I will use when creating my own rooftop. The buildings in this image are quite tall and have large rooftops, this is something I want to implement in my own NYC rooftop to allow more space for industrial equipment. In addition the buildings look like they have a lot of space between them, this is something to want to avoid doing as I think that having the buildings close together looks more natural for a New York City rooftop.
This second rooftop is from Watch Dogs and looks quite similar to the previous rooftop. Watch Dogs is based in Chicago and the rooftops and buildings have a similar presentation to New York structures. However the rooftop in this image is not cluttered with various industrial equipment, compared to a typical rooftop of New York City. There is a lot of space on the rooftops so there would be enough room for moving around in the game.


The last game rooftop is from Batman Arkham Origins and shows what a building rooftop would look like during Winter. This rooftop doesn't have as many industrial equipment such as water tank and air conditioners, however it has a lot of smaller buildings/huts. The buildings are quite close together but are not connected compared to a typical view of a New York rooftop, however the small huts do make up for this. This image may have been a view of the apartments in the city as more balconies can be seen around the buildings.
Research - Reference Imagery
I found ten images from Google Images to use as inspiration or as a reference when I create my own rooftop. These ten images are ones I liked the most.


Maya - Intial Development of NYC Rooftop
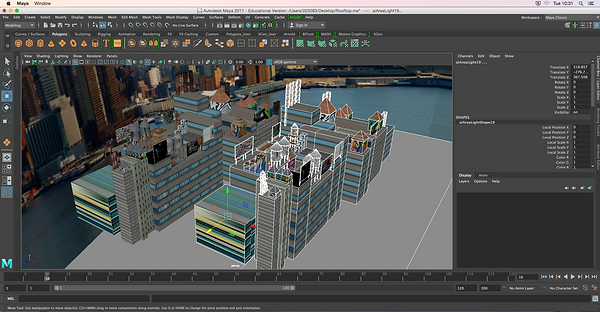
Below are some screenshots of early stages within developing my NYC rooftop. I initially had to create large, high structures by using the interactive design feature within Maya to represent the buildings of New York. I then created other smaller assets such as billboards, water tanks, bridges, staircases and air conditioners. I used my reference images above to create this and position them in the most appropriate place.


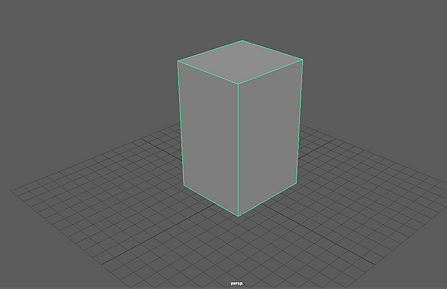
The first stage involved me created high structures to represent buildings. I needed to create many of these so I had enough space to place assets on the rooftops. I used the interactive design feature to easily create the shapes that I wanted. From my research, many buildings and skyscrapers in New York City come in many shapes and sizes so some of the structures I created were very varied in appearance.
I also had to place the buildings close together in order for the assets to be placed correctly at a later stage. Later on I will add more detail to the outside of the buildings by creating windows on them, therefore adding more realism. Below is an example of how the interactive design feature is used. I simple select shape you want to use (in this case a square) and you can then adjust the size by dragging left or right with the mouse.

Maya - Asset Creation
New York City rooftops are very known for the amount of industrial equipment on them and its gritty appearance. Therefore in order to add this detail to my NYC rooftop, I had to create individual assets to place on top of the buildings. Below are some renders of some of the main assets I used on my rooftop, they are the basic shape of the structure and I may add more detail to them later on. I used multiple of asset all around my rooftop and positioned them in the best place. I also talked about the sizing and positioning of the assets in comparison with the buildings.


These are double water tanks that I modelled. I enlarged a cylinder and placed a cone on top to make them, and then I placed four smaller cylinders underneath on the edges of both the water tanks to support the structure. I then added extra support by creating four more cylinders on either side. During my research I discovered that most of the structures on a NYC rooftop are mainly water tanks, so I wanted to make them look big to make them stand out more.
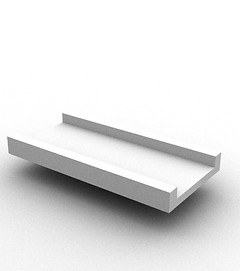
Another asset I created was large advertisement billboard. This was very easy to create as all I needed to do was make a thin rectangle and then place four small cylinders underneath. In my research I found that many of these are placed around New York City, especially rooftops. Places such as Times Square is very known for having advertisements all the around the area, so in a later stage I will texture these billboards with advertisements form known companies. I didn't want to place too many of these billboards as I wanted to use the space for the other assets but in real life these billboards are very common in New York, advertising technology, food, political views etc.
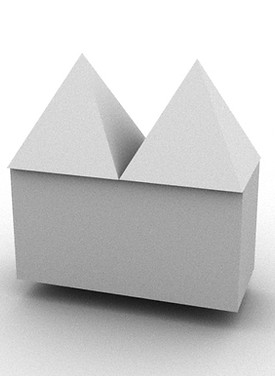
These structures are meant to represent small huts on NYC rooftops. Not a lot of these aren't extremely common on New York rooftops but I wanted to use them to represent storage, cleaning and electricity rooms. New York rooftops look very industrial, so these small structures go together with the other more common assets such as the water tanks and air conditioners. Later when I texture these, I will mostly likely add graffiti to them or make them look rough. This will present the rooftop as more gritty.


This asset is a bridge that I created to connect separate buildings of my NYC rooftop. When making my my rooftop not all the buildings will be right next to each other, so using these small bridges with help join them together. This asset wasn't used very much, but was still needed to add variety.
The next structure I created were smoke pipes to further the industrial theme of NYC rooftops. I mentioned earlier that the appearance of New York rooftops look very gritty and cluttered so these smoke pipes add to that concept. I created these by initially making three medium-sized cylinder to represent pipes and then I created a thick rectangular box underneath to represent a base and support.
An important factor I had to consider was the scale of the assets. I had to ensure that all the assets were the same size and were in proportion with the buildings. I also had to ensure that the individual components that made up each of the assets were the most appropriate size. If the scale was not right the rooftop would less realistic.
Maya - Texturing Techniques
An important stage during the development of my NYC rooftop was texturing. A basic way of texturing was simply using the materials offered in Maya, these are basic colours that can be applied to the mesh. However these materials cannot be used on more detailed assets such as the buildings. A more advanced way of texturing was initially searching for an appropriate image on the Internet and applying it to the asset. The next step would be to then adjust the size and position of these applied textures, this is a more difficult process as this may distort the texture used.
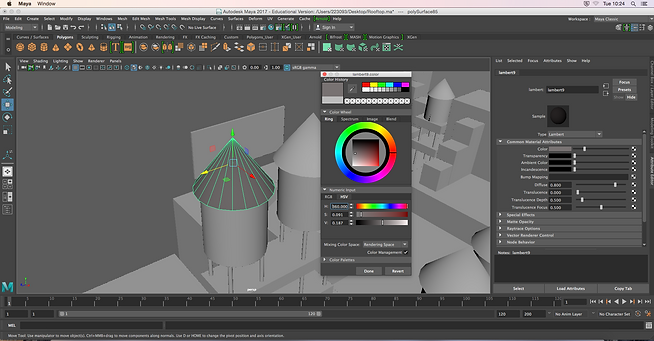
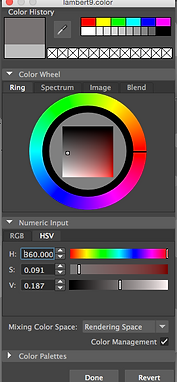
The basic way of texturing is first selecting the face that you want texture, right clicking and selecting 'Assign New Material'. This box on the right then allows you to edit the properties of the mesh, however in this case the colour can be edited. You can then select the colour you want to use in the left box. A variety of colours and be selected and used with many different shades as well.

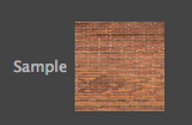
The sample is essentially the colour or materials that is currently being used on the mesh. By changing the colour in the mater editor on the right, the mesh will be affected. On the right side is an example of what the applied colours/materials would look when rendered. These colours can be used on basic assets but is not very effective on larger, more detailed assets.

A more advanced way of texturing is to use actual pre-made textures and apply them to the asset/mesh. Game developers would have positions for creating textures for game assets, however for my NYC rooftop I will be using pre-made textures from the Internet.

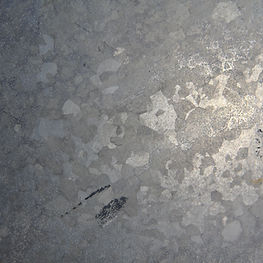
The first step is to select the object that you want textured. In this example I intend to texture one of the faces of a building. In the picture on the right, the mesh may not look like a building right now but once textured it will look more realistic. I will be using a pre-made texture composed of bricks to represent a building. The texture I will be using is the image above. Game developers would create their own textures in photo manipulation software, however in this case I will be using a texture from the Internet.


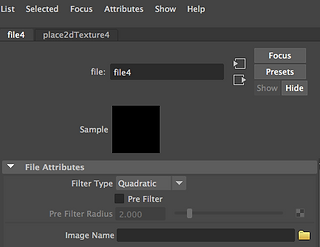

The next step would be to select the texture you want to use. By right clicking on the face of the object, selecting 'Assign New Material' and clicking 'Lambert', a box on the right will appear allowing you to change the material of the mesh. The sample represents the colour or material that is currently being used on the object. If you click on the small white and black box next to the colour editor, another box will appear allowing you to choose textures. In this case I wanted to use a pre-made texture from the Internet so by clicking on 'File', you can choose the image/texture you want from your computer.
Once the texture has been selected the sample will change. In this case I wanted to use a texture made up of bricks, I selected the file on the computer and the sample was successfully changed. The texture will not appear on the object yet as it needs to be dragged on first in the Hypershade editor. This will display all created textures.


To open up the Hypershade editor, you need to click on the round blue circle at the top. This will open the editor and all the your created textures including the one just with the bricks can been viewed. By simply clicking and dragging the created sample onto the face of the object, the texture will be applied. By clicking on the small, black and white sphere at the top, all textures applied and be viewed on your mesh. Texturing is a long and important process when creating environments such as this one.
Maya - Texture Scaling
The next step would be to scale the applied texture. In the image above, the texture has been applied to the face of the object, however the bricks look too large and unrealistic. There are two different ways of manipulating the texture and adjusting the level of zoom and its size. This is an important step as buildings of New York do not have bricks as large as the one seen in the image above. In addition when the brick texture is applied to the surrounding faces of the objet/building, the textures must be aligned with each other.

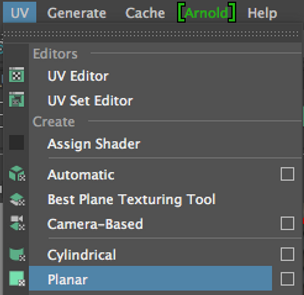

This step is quite simple as you firstly must select the face or mesh that has the applied texture. Then you have to click UV at the top and select 'Planar'. A scale will then appear overlapping the texture of the face or mesh. Using the small coloured boxes at the sides of middle, you are able to adjust the size and position of the texture. In this case I made my building texture smaller, so the windows were not as big and so there were more of them. This is very useful in making textures more realistic when they are applied onto the mesh.

Another optional step is to use the UV editor to change the position of the applied texture. By clicking on the UV editor tool at the top, you can then move the texture around to your liking. In this case I wanted to use a Google Pixel phone advertisement on a billboard I created. I was able to use the Planar tool from the previous step to scale the texture and then use the UV editor to move the texture around to my preferred position.

Maya - Rendering/Lighting

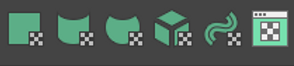
The final step is to use lighting and to render the mesh. There are many ways of producing light within Maya, one effective way of doing this is to use the 'SkyDome' tool. The 'SkyDome' tool creates a big sphere around the mesh, making it brighter. After light has been implemented, the next part is to render it. A render is a 2D representation of a 3D model. In Maya, I used the 'Arnold' rendering tool to render my NYC rooftop as seen on the left. In the rendering window you can further just the lighting and the gamma settings.

By clicking on the 'Arnold' tool at the top, this will open a variety of tools. The step is to click on the blue circle as seen on the image at the top. This is the 'SkyDome' tool, this will create a big dome around the mesh. Using this feature will add more brightness to the final render of the rooftop. In addition this will eliminate the black background in the final render that is usually caused by the lack of lighting or a background.


To render you need to click on the small box at the top that says IPR. This is essentially the Arnold renderer or the Interactive Photorealistic Renderer that I'll be using.
The rendering time is dependant on the how detailed the mesh is. Once the mesh is rendered is can be further adjusted by using the brightness and gamma settings at the top.

In addition to using the skydome to produce light, you can also add a plane if you wanted to have a plain grey background in the final render. This can be done by using the plane feature and scaling it to the point where it becomes a background for the mesh. On the image on the right I used the plane feature and made it gigantic by scaling it. After this is done the skydome technique must also be used to add light to the mesh.


Once rendered a plain grey background will appear behind the mesh in the final render. This makes the render look even brighter than it was before because the background is more clear as opposed to the sky background previously.
Maya - Background Texturing
A way of making my NYC rooftop look more realistic is too add an image of New York City in the background. This will add scenery to my rooftop and give the impression of more buildings. This is a very common technique used in games as it makes scenes look more realistic and saves time during development. In addition this will also help later when rendering my final build as it would add more depth to the renders.

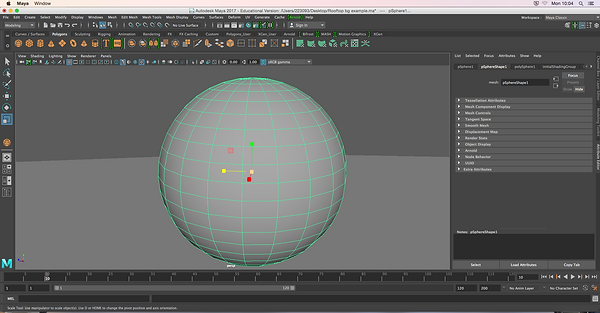

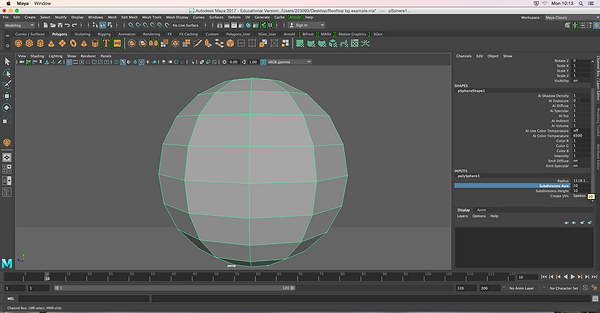
This first step would be to simply create a sphere and enlarge it using the scale tool. Then to move the enlarged sphere so it surrounds the entirety of the NYC rooftop. I did this so when applying the image in a later step you would be able to see the whole background. Then sphere must be big enough so when rendering, the only thing that can be seen is the New York City background and nothing else.

The second step is to reduce the amount of faces on the sphere by decreasing the subdivision axis and height. On the right i reduced both subdivisions to 10. As a result the amount of faces on the sphere has been reduced. I did this so that in a later step the NYC image would look more straight and look as if it was apart of the scene. Otherwise the image would curve around and look unrealistic.

After reducing the subdivisions I removed the whole of the top and bottom half of the remaining sphere. These were just unnecessary faces and won't be needed as the NYC image would be placed in the middle of the sphere. In addition if the top and bottom half of the sphere were not removed then the NYC image would be stretched on the faces when applied.
The final step would be to apply the New York City image onto the faces. When applied I used the UV Planar tool to scale the image and the UV editor to position it in the right place.I had to make the size of the image in alignment with the size of the rooftop. The rooftop must be in correct proportion with the image so that it fits the scene. In a later stage, I will duplicate the buildings of my rooftop so that it will look more realistic and match the background.


The last step of the section is to simply add a plane underneath the background image of New York City and my rooftop. As mentioned in an earlier stage, I did this to remove the black background usually appearing in the final render. If this wasn't done then it wouldn't match the NYC background that I implemented in the scene. In addition this also acts a street for the rooftop and base for the buildings.
Maya - Building Duplication
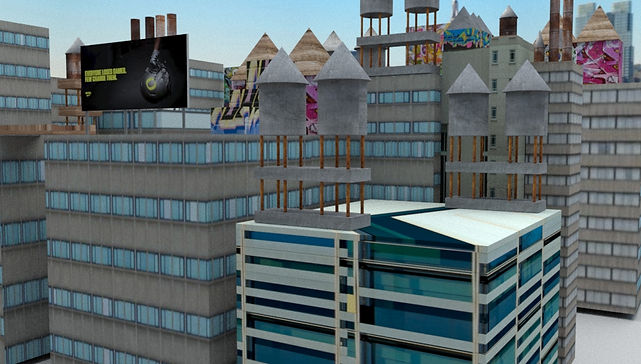
The final stage in my NYC rooftop is to extend the amount of buildings in the scene. I have already made the basic structure of my NYC rooftop, so all I need to do is duplicate the original structure and move the buildings around. I will do this to add more variety to my rooftop and to extend it further. In addition, this step will help in matching the rooftop with the background. When taking the still images in the final renders, it will give the impression that the rooftop is bigger than it actually is.

The step is to simply use the select tool and to select the entire rooftop so that it is ready for it to be duplicated.
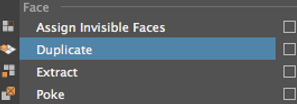
Then I went to the 'Edit Mesh' tools and selected 'Duplicate'. This now allows me to move around the individual buildings of the duplicated rooftop in a later stage. I can now move around and manipulate the buildings.
Next, I am moving around the buildings and positioning them where I want them to be. I could also duplicate the entire rooftop again to increase the realism and size of the scene. This step really adds more variety to my rooftop and makes it look a lot more complex. New York City is incredibly big and it is being extended constantly, so it doesn't necessarily look very organised or planned. I had this idea in mind when extending my rooftop and is the reason why I did not change any of the textures when duplicating to give the impression of randomness and constant development.


Once I had finished moving and duplicating the buildings and I was satisfied with the outcome, my rooftop looked a lot more realistic and bigger in the render. As a result of this stage the rooftop really fit in more with the background.
Maya - Asset Duplication
Just like the duplication of the buildings, I also had to multiply the amount of assets across the rooftop. I did this to add even more variety to the rooftop so the duplicated buildings did not look the same when viewing. If I did not do this step then even though the buildings would look different when moved around, the rooftop overall would look to bland as the assets were not duplicated. I simply selected the assets I wanted to multiply, then I 'Duplicate' in the 'Edit Mesh' tools or I pressed the 'CMD' and 'D' keys.

I continued to do this duplication method across the assets of my rooftop. I mostly duplicated the water tanks as they are structures that are very common and iconic when seeing NYC rooftops, as mentioned earlier in my research. This step definitely added more variety to my rooftop and also created a more scattered impression when viewing.
Final Renders (Still Images)